Showing posts with label Getting Started. Show all posts

Thursday, May 27, 2010

Create a Page Allowing a Mobile User to Invite a Desktop User to Cobrowse

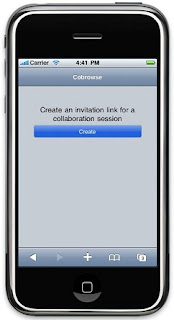
One of the cool new features offered in the CEA Mobile Widgets Technology Preview is the ability to have a desktop user cobrowsing with a user on a mobile device. Since at the time the first user creates the invitation link we don't know if they will share it with a desktop or mobile user we can create the invitation link to a landing page that will re-direct to the page with the appropriate widget.

There are 4 steps to create this landing page. Using JavaScript first strip off the invitation information from the current page. Next check the user agent to determine if the page is running in a mobile browser. If so then redirect to the page containing the mobile widget otherwise redirect to the page for the desktop browser widget. In both cases append the invitation link information. The last step is to edit the joinCollaborationUri attribute in the existing pages for both the mobile and desktop cobrowse to point to this new landing page.

Here is a sample of the HTML/Javascript code for a basic cobrowse landing page:

<html xmlns="http://www.w3.org/1999/xhtml">
<head>
<meta http-equiv="content-type" content="text/html; charset=utf-8" />
<title>CEA Cobrowse Widget</title>

<script type="text/javascript">
var CEA_COLLAB_PREFIX = "cea_collab=";
var href = document.location.href;
var cobrowseString = "";

if ( -1 < href.indexOf(CEA_COLLAB_PREFIX)){

index = href.lastIndexOf(CEA_COLLAB_PREFIX);
collabID = href.slice(index + CEA_COLLAB_PREFIX.length);
cobrowseString = "?" + CEA_COLLAB_PREFIX + collabID;
}

if((navigator.userAgent.match(/iPhone/i)) || (navigator.userAgent.match(/iPod/i)) || (navigator.userAgent.match(/Android/i))) {

window.location = "/cea/cobrowse_mobile.html" + cobrowseString;
} else {
window.location = "/cea/cobrowse_desktop.html" + cobrowseString;
}
</script>

</head>
</html>

Friday, April 30, 2010

CEA Impact Sessions

In case you are looking to learn more about Communications Enabled Applications (CEA) at Impact, here are some talks you can come into:
Enabling Cobrowsing and Coshopping on your website - 2040A Tue, 4/May 10:15 AM - 11:30 AM Venetian - San Polo 3506
Adding Rich Interaction Support to your Enterprise Application - 2272A Wed, 5/May  10:15 AM - 11:30 AM Venetian - Lido 3103

Also, we have a lab on Enabling Coshopping and Two Way Forms on your Web Applications with CEA - 2027A Tue, 4/May 04:45 PM - 06:00 PM Venetian - Murano 3304

Finally, here is a less than 3 minute video showing cobrowsing and the new mobile widgets we have made available and will be demoing at Impact here as a tech preview

Add the Mobile Cobrowse Widget to your Application

After downloading and unzipping the ceadojo.zip directory into the WebContent directory of your application these 5 simple steps will get you up and running with the CEA mobile cobrowse widget:

1. Configure the widget page to be full screen and non-scalable using the viewport meta tag

<meta name="viewport" content="height=device-height, width=device-width,
initial-scale=1, maximum-scale=1, user-scalable=no"/>
2. Import the CEA widget toolkit
<script type="text/javascript" src="./ceadojo/dojo/dojo.js"
djConfig="parseOnLoad: true, isDebug: false"></script>
3. Add the CSS for the mobile cobrowse widget
<style type="text/css">
@import "ceadojo/dijit/themes/tundra/tundra.css";
@import "ceadojo/dojox/mobile/themes/iphone/iphone.css";
@import "ceadojo/cea/mobile/widget/Cobrowse/Cobrowse.css";
@import "ceadojo/cea/mobile/widget/CollaborationDialog/CollaborationDialog.css";
@import "ceadojo/cea/mobile/widget/iFrame/iFrame.css";
</style>
4. Add the following JavaScript code to hide the location bar when the page loads
<script type="text/javascript">
window.onload = function() {
setTimeout(function(){window.scrollTo(0, 1);}, 100);
}
</script>
5. Last place the widget as the only element in the page using the following HTML snippet
<body class="tundra mbl iphone">
<div ceadojoType="cea.mobile.widget.Cobrowse" joinCollaborationUri="/cea/cobrowse.html"
defaultCollaborationUri="/"></div>
</body>


Thanks to Steps 1 and 4 when the page loads in the mobile browser it will display full screen as well as scrolling to hide the location bar. This gives the widget an 'app-like' look and feel as well as allows the user to take advantage of all the screen real estate offered by their device.

Friday, February 5, 2010

DevX article on CEA and other WAS Feature Packs

Check out this article on CEA and other WAS Feature Packs on DevX.

"Imagine enabling customers to cobrowse a website with friends – without clunky browser plugins. Imagine two-way forms that help users complete gnarly virtual paperwork – without Java applets. Imagine a warehouse that phones suppliers when inventory is low."

All of those things are possible with the CEA Feature Pack. If you are just getting started, check out this link which links to some of the good content within this blog...and watch this video to learn of other great ideas like those above.

Monday, August 24, 2009

Educational Overview of the Feature Pack

Our IBM Education Assistant has some good presentations and information available to learn more about the CEA Feature Pack. I wish I could embed it here, but after trying to figure out their nested frames I gave up and thought it would be better just to link to it.

Here is the feature pack overview narrated presenation (around 15 mins long)

Also, here is the main page which also has a link to the PDF version of that presentation.

Friday, August 21, 2009

Where to get started?

We have had a lot of activity on our blog here. I have had several blogs highlighting scenarios from retail to finance to inventory management. You can walk through some of the scenarios using the tag cloud on the right sidebar of the blog. Beyond that, there has been a whole bunch of information presented and I wanted to give you all a quick summary and reference to some of those blogs.

First, Roger wrote a great and verbose cheat sheet in PDF format on how to get up and running with the CEA Feature Pack and Plants by WebSphere sample. If you are looking to try it out, his document is a great place to start.

James has written some specific details on which version of vendor systems we tested our CEA Feature Pack against. He also wrote a more in depth piece on how to configure the feature pack to work with Avaya AES.

Andy wrote some getting started and advanced usage blogs on the Web 2.0 widget capabilities in the CEA Feature Pack. To get started, he wrote a blog on embedding the telephony widgets like click to call and embedding the peer to peer cobrowsing (aka coshopping) widget. He also wrote several more advanced blogs on how to create a two way form, how to handle personalized content and actions in cobrowsing scenarios, and how to add CEA widgets to a page already using another version of dojo.

Finally, we had our first guest blogger. Dustin Amrhein tried out the feature pack for the first time this week and found good ways to easily extend the Web 2.0 widgets included. He wrote his first blog showing how you can customize the click to call widget to add the ability to select a specialist. We are looking forward to him writing several more blogs on the other scenarios he tried out.

Tuesday, August 4, 2009

Creating a Basic Two Way Form

We had a brief description of the Two Way Forms feature back in May and since then we've gotten a lot of great feedback. I'd like to expand on that and show the steps necessary to augment an existing dojo dijit style form to create a Two Way Form.

Here is a very simple dojo dijit style form with a single text field
<html>
<head>
<script type="text/javascript" src="/PlantsByWebSphereAjax/dojo/dojo.js"
djconfig="parseOnLoad: true, isDebug: false"></script>

<script type="text/javascript">
dojo.require("dijit.form.TextBox");
dojo.require("dojo.parser");
</script>
<style>
@import "/PlantsByWebSphereAjax/dijit/themes/tundra/tundra.css";
</style>
</head>

<body class="tundra">
<form method="post" action="/PlantsByWebSphereAjax/myAction">
<table border="0" cellpadding="0" cellspacing="5" width="100%">
<tr>
<td><label for="fullName">Full Name</label></td>
<td><input id="fullName" type="text" name="fullName" class="medium" dojoType="dijit.form.TextBox"/></td>
</tr>
<tr>
<td><input type="button" name="submit" value="Submit" alt="Submit"></td>
</tr>
</table>
</form>
</body>
</html>

1. The first step when creating a Two Way Form is to replace the existing javascript import with one pointing to ceadojo, the ceadojo toolkit must first be copied to the application from the WAS install.
 <script type="text/javascript" src="/PlantsByWebSphereAjax/ceadojo/dojo/dojo.js"
2. Next you need to replace dojo.require statements with ceadojo.require.
 ceadojo.require("dijit.form.TextBox");
ceadojo.require("dojo.parser");
3. Then replace dojoType with ceadojoType for the input element.
 <input id="fullName" type="text" name="fullName" class="medium" ceadojoType="dijit.form.TextBox"/>
These first three steps update the form to use the ceadojo toolkit that is included in the CEA Feature Pack. Since the Two Way Form interacts with the other CEA widgets to send and receive the notifications its is required that they all use the same version of dojo.

4. Next add the CSS import for the Two Way Form's style
<style>
@import "/PlantsByWebSphereAjax/ceadojo/dijit/themes/tundra/tundra.css";
@import "/PlantsByWebSphereAjax/ceadojo/cea/widget/TwoWayForm/TwoWayForm.css";
</style>
5. Finally add ceadojoType="cea.widget.TwoWayForm" to the form element
<form method="post" action="/PlantsByWebSphereAjax/myAction" ceadojoType="cea.widget.TwoWayForm">
With these five changes you have created the most basic Two Way Form. At this point both the reader and writer will have access to modify the field.

Lets take it a step further. For this scenario we only want the writer to have access to modify the field. By setting the ceaCollabWriteAccess attribute we can make the field read-only for one of the peers.
<input id="fullName" type="text" name="fullName" class="medium" ceadojoType="dijit.form.TextBox" ceaCollabWriteAccess="writer"/>
Note: The roles of reader and writer are determined by who has collaboration control when the Two Way Form is launched. The active user will be the writer and the passive user the reader.

Two Way Forms also offer the ability to perform field validation and data masking for more information on these two topics please check out the Infocenter.

One of the questions that keeps coming up is whether a Two Way Form can be used outside of the Contact center cobrowsing and Peer to peer cobrowsing scenarios. The answer is yes. This works because when the Two Way Form is loaded it checks to see if its being used in a collaboration session and if not the additional attributes are ignored.

This gives you the ability to augment an existing form and only have one copy that can be used for both the single user scenario and the collaborative scenarios offered thru the CEA widgets.
Friday, July 31, 2009

CEA Feature Pack available for download!

We are happy to announce that the CEA Feature Pack is available for download. The CEA Feature Pack can be downloaded here: http://www.ibm.com/software/webservers/appserv/was/featurepacks/cea/.

Additionally, the new documentation (aka InfoCenter) is available here: http://www-01.ibm.com/software/webservers/appserv/was/library/v70/fp-cv/index.html.

Finally, here are the support pages: http://www-01.ibm.com/support/docview.wss?rs=180&uid=swg27016107.

All of the links will be updated in the sidebar ---->

Thursday, July 30, 2009

CEA FEP will be available tomorrow!

Recently, we sent out an announcement about the availability of the WebSphere Application Server Feature Pack for Communications Enabled Applications (CEA) V1.0 . I wanted to highlight some of the points in the announcement..

Planned availability date
July 31, 2009


The WebSphere Application Server family is an innovative, performance-based application foundation for building, deploying, and managing all types of applications, and for ensuring they deliver on business objectives regardless of the situation. At its core, it provides a highly-effective performance foundation for creating and implementing agile and re-useable SOA applications and services. This Smart SOA Application Foundation can help you to deliver on business objectives and contain or even reduce cost across mainframe and distributed applications and all interaction modes (for example, Web 2.0 or voice).
Only WebSphere Application Server has the three foundational attributes to enable robust and agile business applications:
  • Efficient development and management
  • Highly effective performance
  • Application innovation

The WebSphere Application Server Feature Pack for Communications Enabled Applications (CEA) V1.0 helps simplify development of innovative applications by offering an SOA-based programming model to add multimodal communications capabilities such as Click to call, Cobrowsing and Two-way Synchronized Forms, to existing and new applications using existing Java skills.
WebSphere Application Server Feature Pack for Communications Enabled Applications V1.0 is a product extension available to WebSphere Application Server V7.0 customers that:
  • Delivers an innovative programming model that simplifies the addition of communications capabilities into existing and new applications by leveraging existing Java skills
  • Provides Web services and REST services-based APIs which enable a richer user experience and increases user interaction effectiveness
  • Delivers customizable and extensible multi-modal communications widgets: Click to call, Contact Center Cobrowsing, peer-to-peer Cobrowsing and Two-way Synchronized Forms
  • Provides a unit test environment to prototype and test applications without the need to access the corporate Telephony/Unified Communications network
  • Provides third party Telephony/Unified Communications support and an on-ramp to CEBP (communications enabled business process) solutions
  • Supports the latest Session Initiation Protocol (SIP) Servlet 1.1 standard (JSR 289)


Telephony interoperability -- Tested with leading Telephony/Unified Communications solutions:
  • Avaya Communication Manager
  • Cisco Unified Communications Manager


We were so excited to have gotten this release out the door and into our customer's hands. The entire team did a great job innovating throughout this product and we did a significant amount of test against the platform even testing against Cisco and Avaya infrastructures. We plan to have more information on our testing and usage of the product now that we are generally available but go on and download the feature pack and try it out for yourself!

Wednesday, July 1, 2009

Embedding the CEA Peer to Peer Cobrowsing Widget

The first step when embedding any of the CEA widgets into your application is to copy the ceadojo directory ( <washome>\feature_packs\cea\javascript\ceadojo ) into your application.

Based on where you copied the ceadojo directory you will need to use that path when pointing to the various JavaScript and CSS files. For this post I will assume that I've copied the ceadojo directory directly under the context root and the HTML file that I am adding the widget to is at the same path.

For the
Peer to peer cobrowsing widget we need to import the following CSS files:
<style type="text/css">
@import "./ceadojo/dijit/themes/tundra/tundra.css";

@import "./ceadojo/cea/widget/Cobrowse/Cobrowse.css";

@import "./ceadojo/cea/widget/CollaborationDialog/CollaborationDialog.css";

</style>

The next step is to import the CEA widget toolkit. Importing the CEA widget toolkit is just like importing any other Dojo toolkit.

<script type="text/javascript" src="./ceadojo/dojo/dojo.js" djConfig="parseOnLoad: true, isDebug: false"></script>
The CEA widgets are built on top of Dojo's Tundra theme. So next we need to add this theme to the body:
<body class="tundra">
And finally the last step is to place the CEA widget on the page. The following HTML code snippet will place the Peer to peer cobrowsing widget on the page:
<div ceadojoType="cea.widget.Cobrowse" joinCollaborationURI="PlantsByWebSphereAjax/cobrowse.html" defaultCollaborationUri="index.html" ></div>
There are a few additional attributes that need to be configured for Peer to peer cobrowsing.
  • joinCollaborationURI is used by the Peer to peer cobrowsing widget to generate the invitation link that can be sent to the peer.
    This needs to be a link to a page that contains the Peer to peer cobrowsing widget and can accept an additional request paramater. Commonly this will be a link to the current page you are adding the widget to or a specific page created with instructions detailing how to use Peer to peer cobrowsing. For example in the plants sample we used the same page we added the widget to
    "/PlantsByWebSphereAjax/cobrowse.html"
  • defaultCollaborationUri specifies what page to load first when Peer to peer cobrowsing is started. For example in the Plants sample we used "/PlantsByWebSphereAjax/index.html"

Friday, June 5, 2009

Embedding the CEA Telephony Widgets

The first step when embedding any of the CEA widgets into your application is to copy the ceadojo directory ( <washome>\feature_packs\cea\javascript\ceadojo ) into your application.

Based on where you copied the ceadojo directory you will need to use that path when pointing to the various JavaScript and CSS files. For this post I will assume that I've copied the ceadojo directory directly under the context root and the HTML file that I am adding the widget to is at the same path.

For the Click to call widget we need to import the following CSS files:
<style type="text/css">
@import "./ceadojo/dijit/themes/tundra/tundra.css";

@import "./ceadojo/cea/widget/ClickToCall/ClickToCall.css";

@import "./ceadojo/cea/widget/CollaborationDialog/CollaborationDialog.css";

</style>
The CSS imports for the Call notification widget are the same just replace ClickToCall/ClickToCall.css with CallNotification/CallNotification.css.

The next step is to import the CEA widget toolkit. Importing the CEA widget toolkit is just like importing any other Dojo toolkit.
This step is the same for both telephony widgets. ( Note: I will cover the steps to import ceadojo on a page already using Dojo in a later post )
<script type="text/javascript" src="./ceadojo/dojo/dojo.js" djConfig="parseOnLoad: true, isDebug: false"></script>
The CEA widgets are built on top of Dojo's Tundra theme. So next we need to add this theme to the body:
<body class="tundra">
And finally the last step is to place the CEA widget on the page. The following HTML code snippet will place the Click to call widget on the page:
<div ceadojoType="cea.widget.ClickToCall" widgetNumber="xxx-xxx-xxxx" enableCollaboration="true" canControlCollaboration="true" defaultCollaborationUri="cobrowseWelcome.html"></div>
There are a few additional attributes that need to be configured for Click to call.
  • widgetNumber is used by the Click to call widget to determine what number to call.
  • enableCollaboration determines whether this widget will be made available for Contact center cobrowsing. If Contact center cobrowsing is enabled you should also configure the next two attributes
  • canControlCollaboration determines whether this widget will be able to drive the collaboration session
  • defaultCollaborationUri specifies what page to load first when the Contact center cobrowsing is started.
The following HTML code snippet will place the Call notification widget on the page:
<div ceadojoType="cea.widget.CallNotification" enableCollaboration="true" canControlCollaboration="true" defaultCollaborationUri="index.html"></div>
For the Call notification widget the same attributes apply, however "widgetNumber" is an optional attribute that determines what number to monitor for incoming calls. If not specified the user will be presented with a textfield to enter the number.

Embedding the CEA widgets in your application

In Erik's post "Widgets in the CEA Feature Pack" he gave a high level overview of some of the widgets that are included in the CEA Feature Pack. I'd like to take it step further in the next few posts and discuss how easy it is to embed each of these widgets in your application.

If you had a chance to check out our widgets in the Open Beta you will notice that the steps to embed the widgets have gotten simplier. This is all thanks to the ceadojo custom build that was shipped with the Beta refresh. This custom build packages the CEA widgets with a specific version of Dojo and eliminates the need to declare the cea module path and "importing" the widget.

Thursday, June 4, 2009

Refresh of the Communications Enabled Applications Beta

Good news! We have a refresh available of our Communications Enabled Applications Feature Pack.. This refresh provides a lot of fixes as well as some new function. With this refresh we are going to start to blog how some of these APIs, particularly the easy to embed web widgets, can be added to applications and websites.

One new piece of function included in this release is the ability to support third party providers of the underlying telephony integration. This will allow our partners to provide Unified Communications integration with extended functionality or in a way other than through using SIP CTI.

I would encourage you all to download the beta refresh and install it!

Monday, May 11, 2009

Getting Started with the CEA Widgets is Easy!

From the very outset of the CEA project, the development team has focused on providing a top-notch out-of-the-box experience; as a result, installing, configuring, and exploring the feature pack is quick and easy. The beta library materials provide complete setup instructions, but we would like to highlight the basic steps here today.
  1. Download and install the new IBM Installation Manager utility available via IBM WebSphere Application Server V 7.0 Feature Pack for Communications Enabled Applications Open Beta. Then use Installation Manager to install the CEA Feature Pack. (Installation Manager already includes the addresses of the appropriate IBM software repositories.)
  2. Create new configuration profile(s) that support CEA or augment your existing profile(s) to support CEA.
  3. Install, configure, and start the sample IP-PBX application included with CEA.
  4. Download, install, and configure two instances of a free softphone (available from several suggested vendors).
  5. Configure, install, and start the CEA PlantsByWebSphereAjax sample application (site) that includes the widgets.
After completing these steps, you can use the CEA PlantsByWebSphereAjax application to verify your setup and explore the features of the widgets. (CEA also includes samples for exploring the Web Services interfaces to the communications features.)

It's that easy...